Saturday, 9 April 2022

Pansy Patch Fancy Fold for the Stamping Inkspirations Blog Hop - April 2022

Hello and welcome to my blog! Today I am taking part in a blog hop with some fellow enthusiasts who love sharing their creative talents using their Stampin' Up!® products. This month the Stamping Inkspirations blog hop is all about Fancy Folds.


When I visited a friend earlier this week I saw she had a gorgeous display of pansies in her garden. They looked delightful nodding their pretty heads in the breeze! So, I decided to use the Pansy Petals Suite to make my cards with today. I love fancy fold cards and I'm looking forward to seeing what everyone else has created.

I have chosen to use my favourite fancy fold (for the second time this week!) to make my card with - it's a great way to showcase pretty papers.

As usual I was indecisive when it actually came to choosing the papers - they are all so pretty. To avoid making too many decisions I began to make a whole batch of cards. Here are the completed ones.


After selecting the DSP, I picked a coordinating cardstock to make the card base and mini fold out card. They measure 22.3cm x 10.5cm, scored at 7.5cm and 20cm x 7.5cm, scored at 10cm (which in imperial measurements would be 8 1/4" x 4 1/4", scored at 2 3/4" and 7" x 3", scored at 3 1/2"). A narrow border of coordinating card all around the DSP creates a frame to enhance it.


I found some pre-prepared pansies in my ready-to-use pile which worked perfectly with the Fresh Freesia card and I merely supplemented them with a die cut elements, a simple sentiment (using only part of the stamp) and a trio of silver metallic pearls.


This DSP works really well with either Pale Papaya and Polished Pink. Even though it is not a colour I use very often, I decided to go with a Pale Papaya base and to add a pop of Polished Pink. The petals and leaves were curled and curved slightly, adding to the texture added during the die cutting process, before attaching them to the card using glue dots and Dimensionals. The sentiment was white heat embossed to make it raised and shiny.


The third card is a mixture of the previous two! Mixing and matching the DSP is so easy - and that's why I couldn't decide which to choose. This card has a Polished Pink base and a Pale Papaya/Shimmery White pansy and Soft Succulent leaves. I finished off the card with a trio of InColor jewels and a stamped Happy Birthday sentiment.

Here they are all together...and I still have a couple left to finish!


I hope that you are inspired by my cards today and that you will continue along the hop to see what the others have created too. Enjoy the projects. We would love to hear from you and so if you have been inspired, please leave a comment.


Angie McKenzie  ●  Tricia Butts  ●  AurĂ©lie Fabre

Karen Egan  ●  Teri West  ●  Gez Carpenter

Susan Webster  ●  Rochelle Laird-Smith   ●  Sue Allen

Jill Chapman  ●  Leonie Stuart  ●  Karen Henderson

Mo Rootes  ●  Rebecca-Jo Unwin  ●  Danielle Kassing

Vickie Littlewood  ●  Marieke Bart  ●  Robbie Susan Chandler

Terry Hamilton  ● Jan Musselman  ●  Kimberley Morris

Do you need any of the products used on today's card? If you live in the UK you can click on the shopping links below to add them to your collection today.

Thank you for joining us today! Looking forward to seeing you next time. Stay safe and as always, happy crafting,


If you would like to order any supplies, and you live in the UK, I would love to be your demonstrator. Use the hostess code 
7RAXMJYS to get some free product (it will follow in the post after the end of the month). If your order is over £150 do not use the code as you become the hostess and get the rewards. To place an order please visit my online shop HERE

If you would like to join my team, you can choose your starter kit HERE and if you have any questions, please contact me at furrycatdesigns@gmail.com

Click on the images below to purchase them in my online shop:


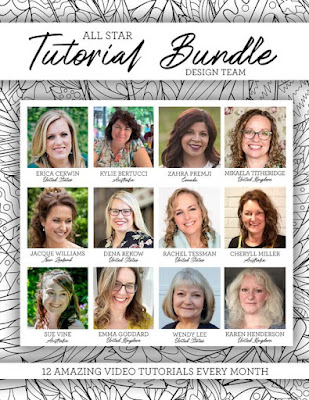
All Star Tutorial Bundles

All Star Tutorial Bundles have 12 AMAZING video tutorials to inspire you each month.


Click HERE for sneak peeks or to purchase.
FREE with a purchase from my online store
 

Wednesday, 6 April 2022

All Star Tutorial Bundle Blog Hop - New Horizons Suite

Hello and welcome to our All Star Tutorial Bundle Design Team Blog Hop for April 2022. This month we are using the New Horizons Suite. The projects featured in the bundle are exclusive and the tutorials come complete with photos, video directions and a supply list that includes both Metric and Imperial measurements. 


Here is a sneak peek of the New Horizons Suite bundle of tutorials.


To enjoy the tutorials you have several options:

  • shop with me -  if you order from my online store you will receive that month's bundle for free
  • purchase - buy the bundle for £11.00 
  • Join my Team - team members will receive the tutorials for free

To give you even more inspiration each of us has created another project using the New Horizons products. Here is my project for today.


This watercolour effect DSP really is a joy to use, and for today's project the design made it super easy to produce a second card with very little extra effort. I'm really happy with the results!
 

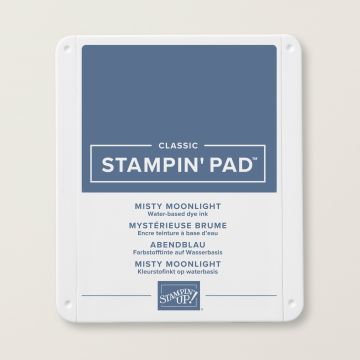
The DSP you choose to use will dictate the colour of your card base - I am working with Misty Moonlight. It is an InColor which will be retiring soon and I am so going to miss it! For the first card I cut a normal height card base that extends to the whole length of the cardstock, which I then divided roughly into thirds. I covered the front panel with DSP leaving a small border around the edges and then cut an aperture using one the stitched rectangle dies (save the offcut for card two!). Then, I took a second piece of DSP and positioned it so that the view continues through the window.


To complete the card I added fences to draw your eye into the scene, stamped the birds and scattered some of the enamel pebbles. Opening the front panel reveals the continuation of the scene.


Adding a basic white layer to the centre panel allows room for a personal message together with a stamped sentement that is only seen when the card is opened fully.


Using the leftover die cut panel it is super easy to make a second card. 


Simply add another stitched rectangle to act as a frame and then layers of Basic White and Misty Moonlight to a Basic White card base. The decoration is minimal - just a die cut fence, some stamped birds and grasses.

To begin with, I felt rather decadent using two sheets of DSP on one card, but using the leftovers to easily create a second card justified the decision. I hope you like them too.


If you want to be inspired with more ideas using this suite you can purchase the tutorial bundle (along with previous tutorials) HERE

Thank you so much for visiting today. Click on the names below to hop around and see all the other amazing projects. Enjoy! If you live in the UK you can purchase these products below.

Blog Hop List:

Stay safe and as always happy crafting,


If you would like to order any supplies, and you live in the UK, I would love to be your demonstrator. Use the hostess code
7RAXMJYS to get some free product (it will follow in the post after the end of the month). If your order is over £150 do not use the code as you become the hostess and get the rewards. To place an order please visit my online shop HERE

If you would like to join my team, you can choose your starter kit HERE and if you have any questions, please contact me at furrycatdesigns@gmail.com

Click on the images below to purchase them in my online shop:


All Star Tutorial Bundles

All Star Tutorial Bundles have 12 AMAZING video tutorials to inspire you each month.


Click HERE for sneak peeks or to purchase.
FREE with a purchase from my online store.
 

Monday, 4 April 2022

Let's Set Sail fun fold card - International Project Highlights for April 2022


Hello and welcome to my blog. This is my card to entry to Kylie Bertucci's International Project Highlights for April 2022 - the theme is Thank you

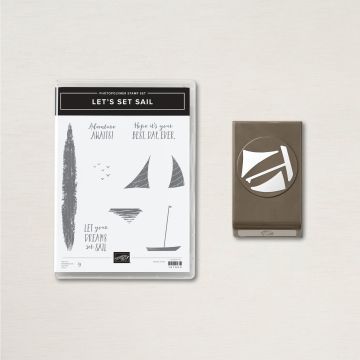
I love Stampin' Up!'s Designer Series Paper, and the New Horizons papers are no different. The watercolour impressionist style of the papers create fantastic backgrounds and they just cry out to take centre stage. I have used these papers to decorate my fancy fold card creating a perfect backdrop for the little sailing boat from the Let's Set Sail set.


This fancy fold card is one of my favourites, but I've taken a different approach this time. Usually, I use at least two different papers or colours as decoration.


This time, however, I have used the same paper across each of the layers so that the scene continues across the whole card without interruption.

The little boat and sails were stamped using matching card and ink and then cropped out using the coordinating punch. The slim, angled banner highlights the thanks for everything sentiment, which is from the On the Horizon set


As mentioned at the beginning I am entering Kylie's International Project Highlights and you can follow the link to the gallery where you will find heaps more inspiration AND you can vote for your favourite five projects. At the end of the voting the Top Ten winners will be invited to take part in a blog hop at the end of the month. 


I would love to take part in the hop, so I would really appreciate your help. Please would you visit the gallery and vote for my card? Click on the little heart on my card, which is number 17.


Thank you so much for stopping by today. If you want to purchase the items used for these cards, or any other supplies, please take a look in my online Stampin' Up! shop. You can follow the link or click on the pictures below of the products I have used today.

Stay safe and as always, happy crafting,


If you would like to order any supplies, and you live in the UK, I would love to be your demonstrator. Use the hostess code
7RAXMJYS to get some free product (it will follow in the post after the end of the month). If your order is over £150 do not use the code as you become the hostess and get the rewards. To place an order please visit my online shop HERE

If you would like to join my team, you can choose your starter kit HERE and if you have any questions, please contact me at furrycatdesigns@gmail.com

Click on the images below to purchase them in my online shop:


All Star Tutorial Bundles

All Star Tutorial Bundles have 12 AMAZING video tutorials to inspire you each month.


Click HERE for sneak peeks or to purchase.
FREE with a purchase from my online store.