Hello and welcome to my blog. When you read this I will be at a Stampin' Up! event called OnStage with lots of other demonstrators. I am going to OnStage Live, which is an event that runs over several days, and this time around is being held in Dortmund, Germany. Smaller, one day events called OnStage Local are also held in other locations around the world so that there is an opportuninty for all Demonstrators to experience the fun.
We
will have demonstrations from Stampin' Up! staff and fellow
demonstrators where we see new products and how to use them. Usually,
there is a chance to have a go ourselves with some of the new products
too.
There is also a great opportunity to meet up with other Demonstrators...friends and soon to be new friends. Swapping is one of my favourite parts of SU! gatherings. You make a collection of cards and swap them with other people. Not only is it a great way to get new ideas but it is also a great conversation starter. Here's mine all lined up together.
I decided that I would re-style a card that I had previously made and convert a Christmas card into a thinking of you card. Same easel structure but revamped using the beautiful Magnolia Lane suite of products. You can see the Christmas version here.
I have used the pretty Magnolia Lane papers to decorate the sides and the easel portion of the card. The flower is also from the patterned papers and die cut using the coordinating Magnolia Memories dies. How fabulous is it that you can cut out a stamped image and one from the DSP using the same die?
The sentiment is heat embossed in white to echo the skeleton leaves on the DSP. It's punched out using the Everyday Label punch and then popped up using dimensionals. This extra height anchors the easel in place. But it folds flat for posting.
I am so looking forward to swapping my cards and looking at all the cards I recieve in return. If
you want to purchase the items used for this card, or any other
supplies, please take a look in my online Stampin' Up! shop. You can
follow the link or click on the pictures below of the products I have
used today.
As always, happy crafting,
If
you would like to order any supplies, and you live in the UK, I would
love to be your demonstrator. Use the hostess code 7BQYE7P4
to get some
free product (it will follow in the post after the end of the month). If
your order is over £150 do not use the code as you become the hostess
and get rewards. To place an order please visit my online shop HERE.
If you would like to join my team, you can choose your starter kit HERE and if you have any questions, please contact me at furrycatdesigns@gmail.com
Click on the images below to purchase them in my online shop:
Hello and welcome to my blog. I am thrilled to be taking part in a blog hop with fellow demonstrators, from all over the world, who are part of Kylie Bertucci's training program. There is no theme for the hop, but there is sure to be some inspirational projects using Stampin' Up! products.
November, for us is a busy birthday month. So my Christmas cards are on hold for just a little while longer so that I can be prepared for these upcoming birthdays. I am using a set from the Annual Catalogue called Beautiful Friendship. It contains beautiful floral images which are distinktive, meaning that you get variations in and depth of colour from just one stamped impression. The flowers look wonderful in a variety of colours from pretty pastels to hot and vibrant. I have used Cherry Cobbler, Real Red, Pool Party and Pretty Peacock for a rich earthy feel.
I experimented on my grid paper to get an idea of how the images looked together because I often find a white open space to be quite daunting and makes it difficult to get going. This Beautiful Friendship stamp has a wonderful blossom stamp that is also a brilliant filler stamp.
So to begin my cards I stamped this large airy image in Pool Party. Yay! The paper is no longer bright white, and so much less scary! I added the large rose stamp in Cherry Cobbler at the top and bottom of the panel and then the stemmed flowers were added in Real Red. The foliage is stamped in Pretty Peacock, sometimes stamping off on to scrap paper first for an even wider variety of shades. The sentiment sings out its message in the middle of the white space, where it really pops.

On my desk there was a pile of squares cut from the Stitched Shapes dies that were left over from a previous project so I had a go stamping on them too. Same process, just a much smaller canvas. I added a layer of Pretty Peacock, one in gold foil for a bit of luxury and a broad one in Cherry Cobbler before adding it to the square base card. To compliment the gold foil I heat embossed the Happy Birthday, from the Itty Bitty Birthdays set, in gold and die cut it using the Stitched Rectangles. The sunlight coming through my window is reflecting on the gold foil and looks really pretty.
A similar square was mounted onto a layer of Cherry Cobbler giving a skinny border before mounting it on to a 3" x 3" Pretty Peacock card. The Well Written dies provide the sentiment for a cute little thank you card.
In a previous crafting session I had made cards using a quartet of Stitched Shapes squares to make a central panel on a card. I tried it again, shrinking the size of the square but still using the same ingredients. It's ecclectic and reminds me of those toys where you had to slide the interlocking tiles around to reveal the picture. Anyway, I finished the cards off using the Well Written dies and heat embossing ideas I had used in the earlier versions. Quite an usual look, but I quite like it.
Here are all of the cards together. I hope you like them.
Thank you for visiting my blog today - you are currently visiting Karen Henderson. Please look at the list below to see who to visit next. I am sure you will find lots of inspiration on your journey aroung the hop. Make sure you don't miss any!
If
you want to purchase the items used for this card, or any other
supplies, please take a look in my online Stampin' Up! shop. You can
follow the link or click on the pictures below of the products I have
used today.
As always, happy crafting,
If
you would like to order any supplies, and you live in the UK, I would
love to be your demonstrator. Use the hostess code 7BQYE7P4
to get some
free product (it will follow in the post after the end of the month). If
your order is over £150 do not use the code as you become the hostess
and get rewards. To place an order please visit my online shop HERE.
If you would like to join my team, you can choose your starter kit HERE and if you have any questions, please contact me at furrycatdesigns@gmail.com
Click on the images below to purchase them in my online shop:
Hello and welcome to my blog. November is a busy birthday month for our family so I've taken a mini break from making Christmas cards to make a few celebratory cards. This first batch of cards has more of a male theme with both my colour selection and the stamp set I chose to use.
I loved using the Geared Up Garage stamps and dies when they were first released, but I have to admit that they have been neglected and left on the shelf for a few months (plenty of distractions from pretty new things is my excuse!). However, for the person I have in mind, this set is the perfect set to make a card with.
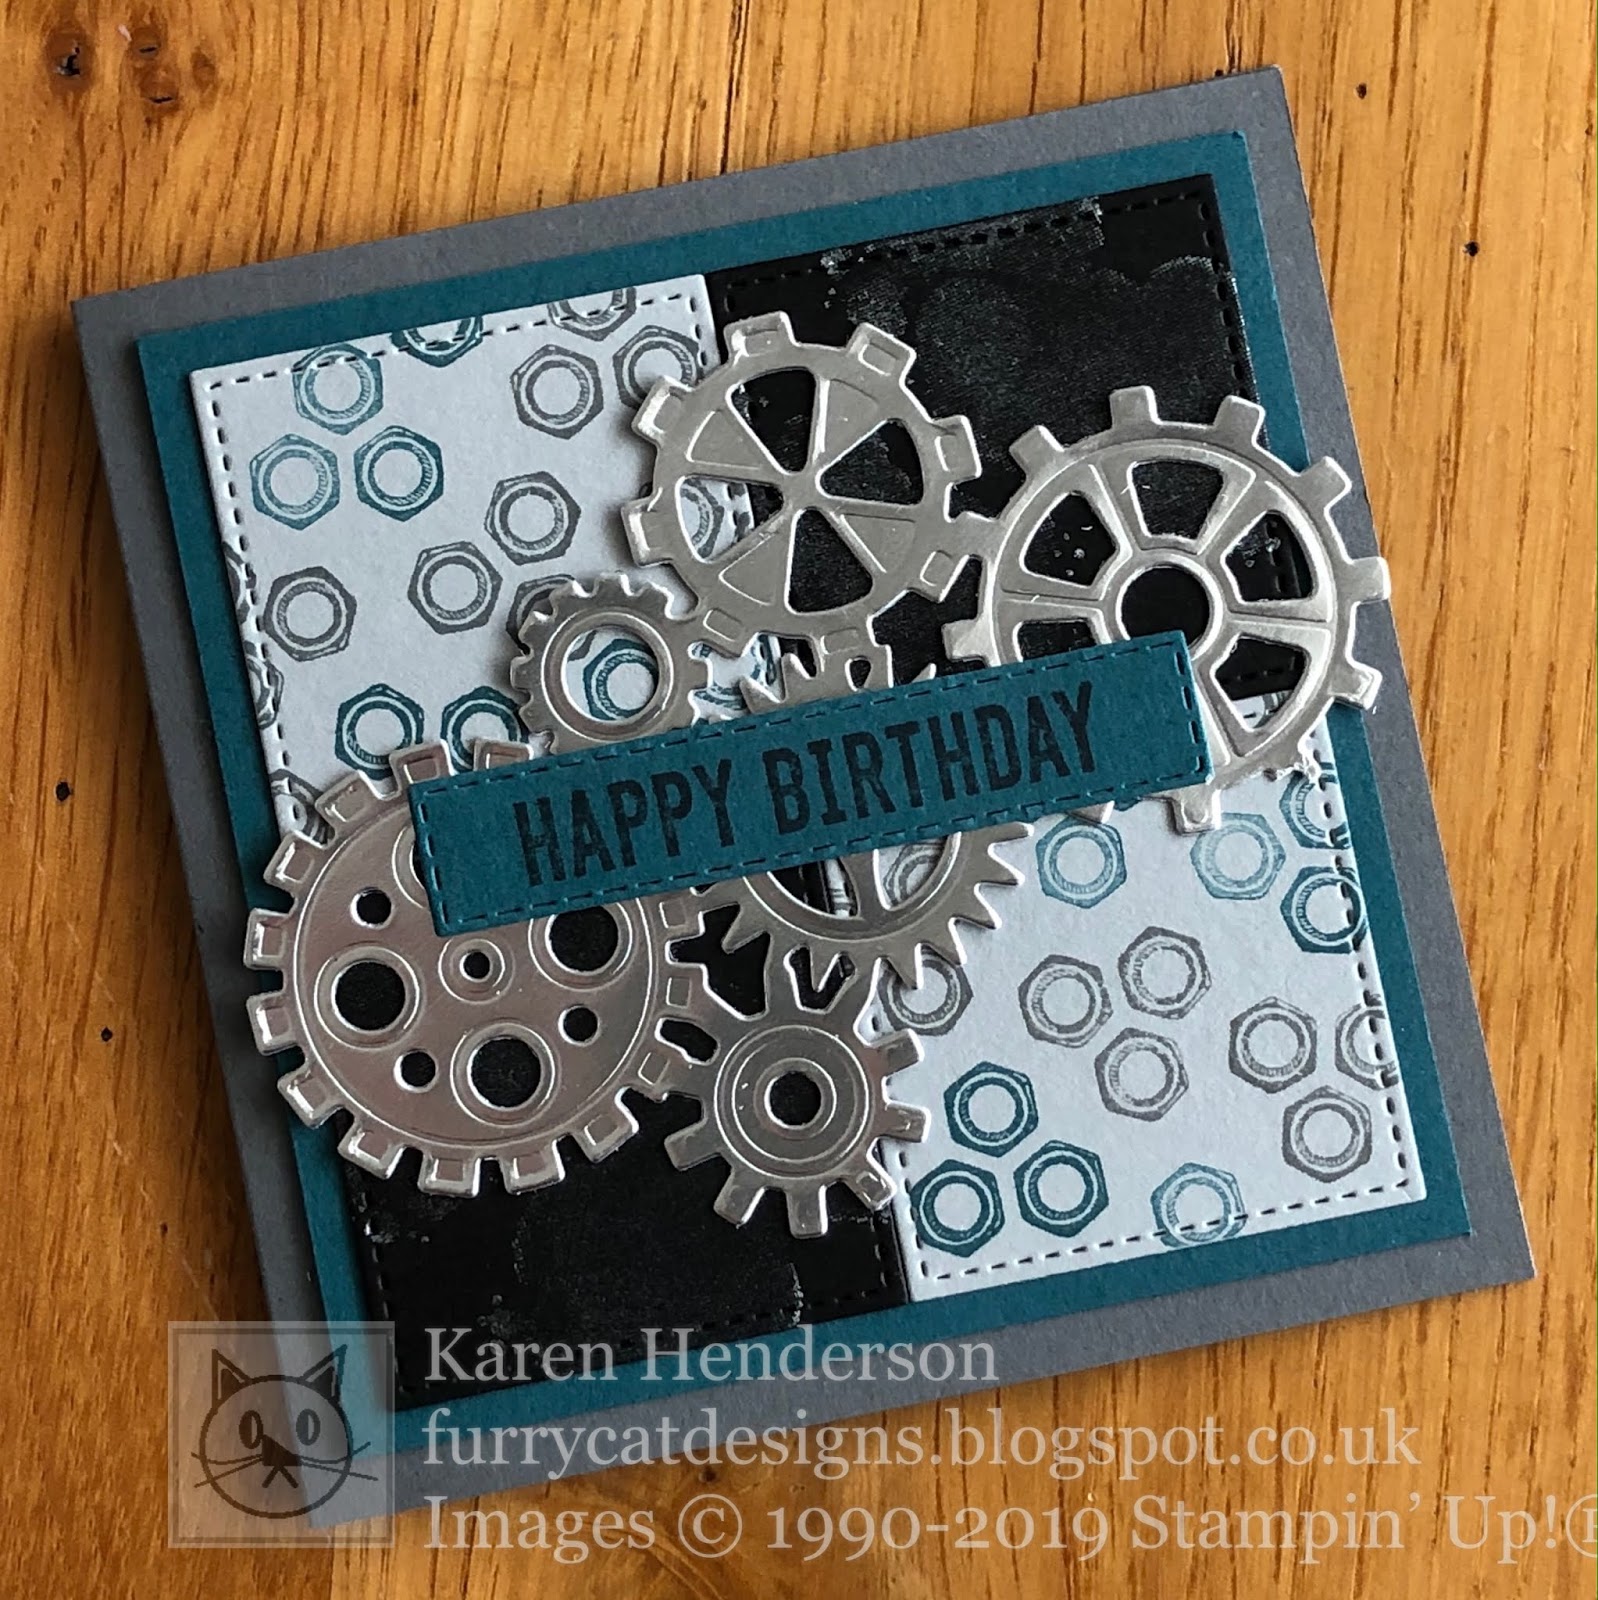
The designer series paper that initially accompanied this set is no longer available, but I remember it fondly and so I have used the stamps in the set to pay homage to it. I have stamped the washers in Pretty Peacock and Basic Grey on Smokey Slate card and the oil spill is stamped in Silver Delicata ink on black card. Then, I used the Stitched Shapes dies to cut out two squares from each of the patterns. These were mounted alternately on a piece of Pretty Peacock, creating a larger stitched edge square. The set of Garage Gears dies has several individual cogs to choose from and one large set of interlocking cogs that can be cut out as one piece. Doesn't this large die look impressive when it is cut out of silver foil?
The Happy Birthday sentiment from the Itty Bitty Birthday set is stamped on to a die cut Stitched Rectangle. There are lots of dies used to create this little card, but it all adds to the coordination. The stitched dies are my favourite, and most used, dies and the Garage Gears are a must because they team up with the stamps!
While I had a pile of coordinating elements on my desk I continued to craft and created a pile of mini birthday celebration cards. I have used similar colours and also stamped and die cut the car. Now my dilemma is, which one do I send first?
Thank you for joining me today. I hope you like this motoring collection and have enjoyed the excursion from Christmas makes.
If
you want to purchase the items used for these cards, or any other
supplies, please take a look in my online Stampin' Up! shop. You can
follow the link or click on the pictures below of the products I have
used today.
As always, happy crafting,
If
you would like to order any supplies, and you live in the UK, I would
love to be your demonstrator. Use the hostess code 7BQYE7P4
to get some
free product (it will follow in the post after the end of the month). If
your order is over £150 do not use the code as you become the hostess
and get rewards. To place an order please visit my online shop HERE.
If you would like to join my team, you can choose your starter kit HERE and if you have any questions, please contact me at furrycatdesigns@gmail.com
Click on the images below to purchase them in my online shop: