Monday, 7 September 2020

Thanks a ton using the Whale of a Time Suite

Hello and welcome to my blog. I'm taking part in Kylie Bertucci's International Blog Highlights for September and sharing with you a couple of cards using the Whale of a Time Suite.  

Initially, I passed over this suite and concluded that it wasn't for me. How wrong I was! A card I received (and Pinterest!) changed my mind completely and now I am literally having a whale of a time creating with this suite!


Our catalogues are fillied with inspirational projects and I often use them as my starting point when I start using a new stamp set. Making something sparks creativity and sometimes sends you off at a tangent, but that doesn't matter! I've used the gorgeous array of mini 3" x 3" cards on page 96 of the Annual catalogue as my starting point today.

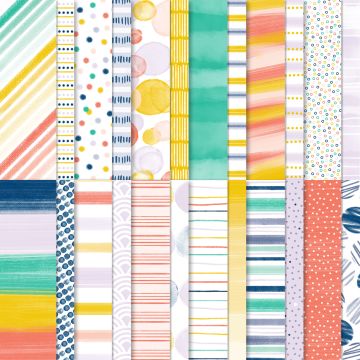
The patterned paper in this suite comes in a 6" x 6" stack, which lends itself perfectly to mini 3" x 3" cards. They can be used as tags and little notes or packaged up for gifting in mini pizza or acetate card boxes. I wanted a slightly bigger 4" x 4" card, and I've two versions to show you. Making a bigger card gives extra opportunities to utilise more of the suite!


Card one used a quarter sheet of DSP layered onto a slightly bigger square of Just Jade that is then mounted onto an embossed sheet of Vellum using dimensionals. The Seabed embossing folder is delicate and detailed and the white highlights through the Vellum are superb. Layering it onto a dark shade adds to the drama and shading. 

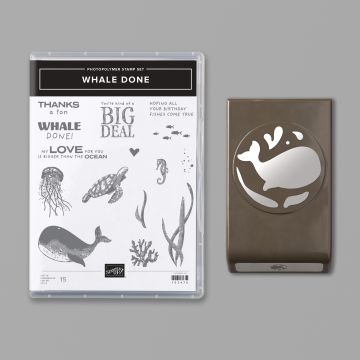
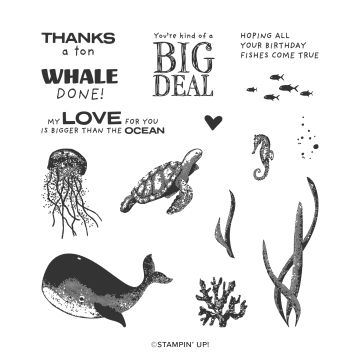
The suite includes a stamp set and coordinating punch bundle - the punch can be used to crop out the largest of the whales from the DSP as well as the stamped image. So, I punched the largest of the whales and fussy cut the smaller two. The bubbles are fun and are just sequins adhered using the fine-tipped glue pen. The thanks a ton is white heat embossed on a strip of Pretty Peacock card with a flag end.

The second card has similar elements, but they are presented differently. The card base has a section of the front flap removed and a reverse opening card folds around it. I believe that this is called a Joy Fold card. This version has a Pool Party 3" x 3" card as the reverse opening element sitting on a Pretty Peacock 4" x 4" card base. I have utilised some bubbles in the pattern on the embossing folder as a background for the whale, which if I'm honest are probably supposed to be seaweed, but it looks right!


The inside of the card has some stamped decoration, a whale fussy cut from DSP and room to write a message. I am thrilled with them - there is an Ahh factor and the colours are fabulous. Pretty Peacock, Just Jade and Pool Party has just become my new favourite colour combination!


I'm showcasing these cards in Kylie Bertucci's International Blog Highlights for September. The
gallery is filled with projects with the common theme of gratitude and saying Thank You. When you visit the gallery you will see that you can participate by voting for your favourite five projects. At the end of the voting the Top Ten inners will be invited to take part in an International Blog Hop at te end of September. I would love to take part in the hop, so I would really appreciate your help. Please would you visit the gallery and vote for my card?


If you want to purchase the items used for these cards, or any other supplies, please take a look in my online Stampin' Up! shop. You can follow the link or click on the pictures below of the products I have used today.

Stay safe and as always, happy crafting,


If you would like to order any supplies, and you live in the UK, I would love to be your demonstrator. Use the hostess code W47PB949 to get some free product (it will follow in the post after the end of the month). If your order is over £150 do not use the code as you become the hostess and get rewards. To place an order please visit my online shop HERE.

If you would like to join my team, you can choose your starter kit HERE and if you have any questions, please contact me at furrycatdesigns@gmail.com

Click on the images below to purchase them in my online shop:


I'm really excited to be a member of the All Star Tutorial Bundle Team. The team comprises 12 Demonstrators from all over the world, and each month we publish a fabulous Tutorial Bundle (12 tutorials compiled into a PDF).


From July 2020 the tutorial bundle is changing to be a VIDEO tutorial bundle. Going forwards, each month the tutorial bundle will include a PDF providing photos, a link to how-to video instructions, a list of supplies used and measurements in both Metric and Imperial.

How can you get your hands on this month's PDF of video tutorials?


Shop with me - if you order from my online store you will receive that month's bundle for FREE. Be sure to use the Monthly Host Code W47PB949
 
Join my Team - team members will receive the tutorials for FREE.

Purchase - Buy the Bundle for £11.50. You can buy in any currency and PayPal will do the conversion for you.

Your tutorial Bundle will be available from the 1st of the month and will be sent to the email address you provide to PayPal.
 

Don't forget about the special September joining offer.


The Starter Kit is always an amazing opportunity - it's £99 and it's fully customisable. You choose catalogue merchandise, of your choice, up to the value of £130 and the kit also includes a business supply pack (valued at at least £25).

During September, in addition to the regular starter kit, new recruits will also receive two stamp sets (So Much Love and Queen Anne's Lace), enough cardstock pieces to make 16 cards, with envelopes, and a pack of Rhinestone jewels. You can choose how to replicate the samples with you friends, family or customers.

You can join HERE to take advantage of the Get & Go promotion. 

Thursday, 3 September 2020

All Star Tutorial Bundle Blog Hop - Playing with Patterns Suite

Hello and welcome to our All Star Tutorial Bundle Design Team blog hop for September 2020. We have some fabulous projects and inspiration for you using the Playing with Patterns Suite on this hop and in our Tutorial Bundle.


What are tutorial bundles I hear you ask?

Each month the Tutorial Bundle contains 12 tutorials with projects and inspiration all featuring the same selected suite or bundle from the Stampin' Up! Annual Catalogue. The tutorials are compiled into a fabulous PDF providing photos, a link to how-to video instructions, a list of supplies used and measurements in both Metric and Imperial.
  • July 2020 - Peony Garden Suite
  • August 2020 - In Good Taste Suite
  • September 2020 - Playing with Patterns Suite
  • October 2020 - Flowers for Every Season Suite
  • November 2020 - Forever Greenery Suite
  • December 2020 - Artistry Blooms Suite
These are exclusive projects and will not be shared on our blogs or social media. Here is a sneak peek for this month.

 
How can you get your hands on the PDF Tutorial Bundles?

Shop with me - if you order from my online store you will receive that month's bundle for FREE. Be sure to use the Monthly Host Code W47PB949
 
Join my Team - team members will receive the tutorials for FREE.

Purchase - Buy the Bundle for £11.50. You can buy in any currency and PayPal will do the conversion for you.

Your tutorial Bundle will be available from the 1st of the month and will be sent to the email address you provide to PayPal.
 
And on to my project for the hop!
 

When I saw this suite in the catalogue the letter dies jumped out at me and I could see so many possibilities - names, numbers for birthdays and anniversaries, hello and thanks to name but a few. The adhesive sheets make adhering the letters to your project really easy. Foam adhesive sheets, which are a solid sheet of dimensionals, can also be used to give your project lift.
 

The Designer Series Paper pack has an array of fabulous patterns. I chose to use a pattern featuring a colour that I rarely use - Crushed Curry. It's teamed up with Night of Navy for a bold looking card. I made a little set of them and they combine several things that make me happy when I'm card making - matting and layering, stitched edges and embossing (especially using the Subtle folder!).
 

There was also the added bonus of two projects for the price of one because I featured the negative space that the letters left behind, saving the solid letters for another day.
 

So that I could replicate the Happy Birthday 2 U graphic multiple times I laid the letters out on my grid paper and taped them together so that I could die cut them as if they were a single die. I applied adhesive sheet or foam adhesive sheet to pieces of card and die cut the letters inside a layering sqaure die all in one go. This nests neatly onto a Stitched Square.
 
 
I decided to replace the bubbles within the letter B back into the negative space. The easiest method that I found to do this was to adhere the negative space graphic to the stitched sqaure and then carefully peel the backing off only the bubble parts of the letter B, replace the die cut B back into it's hole and then stick the bubbles onto the die cut square through the holes in the B. Finally, you carefully remove the solid die cut B, leaving the bubbles behind. The pokey tool end of my Take your Pick tool was very useful for this!
 

Before you continue on your
way around the hop here is a sneak peek of my project included with in the Tutorial Bundle this month.
 

Click on the names on the list below to hop around and see all the other amazing projects from the rest of the team. Enjoy!
 
 
If you want to purchase the items used for this card, or any other supplies, please take a look in my online Stampin' Up! shop. You can follow the link or click on the pictures below of the products I have used today.

Stay safe and as always, happy crafting,


If you would like to order any supplies, and you live in the UK, I would love to be your demonstrator. Use the hostess code W47PB949 to get some free product (it will follow in the post after the end of the month). If your order is over £150 do not use the code as you become the hostess and get rewards. To place an order please visit my online shop HERE.

If you would like to join my team, you can choose your starter kit HERE and if you have any questions, please contact me at furrycatdesigns@gmail.com

Click on the images below to purchase them in my online shop: