Thursday, 4 September 2025

Painterly Pears Suite - All Star Video Class Bundle Blog Hop September 2025


Hello and welcome to my blog. I am delighted to be part of the All Star Video Class Group. We create a Video Class Bundle with
exclusive tutorials complete with photos, video directions and a supply list that includes both Metric and Imperial measurements, and we also hop together each month sharing a different project to inspire you using the same suite.


This month we are using the Painterly Pears Suite and this
is a sneak peek of the projects included in this month's bundle of video tutorials.


Here is a closer look at the sneak peek of my project in the tutorial bundle.


To enjoy the video class bundle of tutorials you have several options:

  • shop with me -  if you order from my online store you will receive that month's bundle for free
  • purchase - buy the bundle for £11.50 
  • Join my Team - team members will receive the tutorials for free

During this six month block of tutorials we will be using current Stampin' Up! Suites to create a Video Class Bundle, each containing 12 exclusive video classes. We will be using a mix of current and upcoming Online Exclusive (OE) suites together with suites from the Annual Catalogue (AC) and the new September to December Mini Catalogue (MC):

  • July 2025 - Florals in Bloom Suite (AC)
  • August 2025 - Floral Impressions Suite (OE)
  • September 2025 -  Painterly Pears Suite (OE)
  • October 2025 - Gathering Together Suite (OE)
  • November 2025 - Lights of Aurora (MC)
  • December 2025 - TBC


Thank you for joining me today for the All Star Design Team Video Class Bundle Blog Hop for September 2025.
At the start of each month, each of creates another project using the featured suite of products to give you even more inspiration. Here is my additional Painterly Pears Suite project.


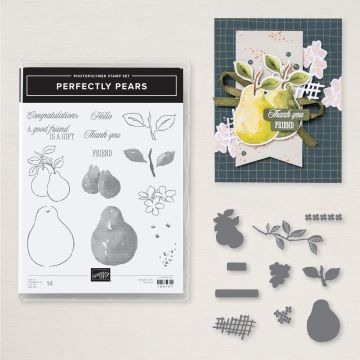
Autumn arrived this week and I've chosen colours to reflect that mood. I used a mix of DSP, Mossy Meadow and Old Olive card to create a joy fold card. Not only do the dies enable the pears to be cut from one of the sheets of DSP but they also cut elements to add texture and detail. The waffle/cross hatched piece is a wonderful accent for any project, as are the tiny individual flowers.


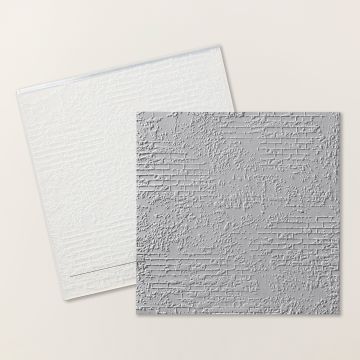
I love adding all sorts of texture and layers on my cards. On this card I have used the Exposed Brick folder together with some die cut leaves on the card front. The 
centre front flap has additional textures with roughed and separated corners, ribbon and iridescent foil gems.

To be matchy matchy there is some embossing in the front of the card. Of course, when you open up the front there is also a spot for a handwritten message!


I feel that I have only just scratched the surface creating with this suite, and I hope you feel inspired to create something with it too. Let me know what you think in the comments below. If you would like more ideas using this suite you can purchase the tutorial bundle (along with previous tutorials) HERE

Thank you so much for visiting today. Click on the names below to hop around and see all the other amazing projects. Enjoy! If you live in the UK you can purchase these products below.

Blog Hop List:

Do you need any of the products used on today's cards? If you live in the UK please take a look in my online Stampin' Up! shop. You can follow the link or click on the pictures below of the products I have used today.

Stay safe and as always, happy crafting,


If you would like to order any supplies, and you live in the UK, I would love to be your demonstrator.
To place an order please visit my online shop HERE. The products I have used on today's project are linked from the images shown below.

All Star Video Class Bundles 

The Video Class Bundles have 12 AMAZING video tutorials to inspire you each month. For September, we are featuring the Painterly Pears Suite.


Click HERE to purchase.

FREE with a purchase from my online store

 Stampin' Rewards Program 


When shopping, remember to opt in to Stampin' Rewards on orders over £20.

Click on the images of the products I have used today to purchase them in my online shop:


Tuesday, 2 September 2025

Gift Card Holder Swaps using Jar of Joy


Hello and welcome to my blog! Today I am sharing the swap cards I made for an in person event I am attending - I do love swapping! The event for Demonstrators and is hosted by Helen Slimm, the UK Demonstrator Development Manager, in Lincoln.

My production line began a while ago and now the finished cards are ready to swap.


The design I chose was inspired by 
Artisan Design Team member Stacey Marsh. The mechanism caught my attention immediately so to start with I copied her card exactly to get me started.


I have used the same mechanism, although the proprtions of my card front are slightly different, and decorated the front with a different topper

While I was completing the last few of my swap cards I took some step by step photos so that I could show you how my production line worked.

The elements required, using metric measurements are:

  • Pool Party card base 10.5cm x 29.7cm, scored at 6cm and 20.8cm
  • Pool Party Nests of Winter DSP 10.1cm x 5.5cm, 10.1cm x 8.4cm and 1.5cm strip for inside decoration
  • Pool Party Slider 8.5cm x 17cm, scored at 1.5cm and 13cm
  • Basic White 8cm x 10.5cm
  • Basic White Banner using Party Banner dies and embossed with Exposed Brick Embossing Folder
  • Circle cut using Stylish Shapes dies in Two-Tone Pool Party card 
  • Scraps of Basic White and Real Red for stamping jar, lid and sentiment

To begin, stamp the jar and snowman in Basic Grey and add scarf/hat detail using Real Red. Stamp Pool Party snow flurries around the snowman. Using the Light Pool Party Blend colour in the walls of the glass jar to add dimension and extra snow beneath the snowman. The carrot nose is coloured with Peach Pie. Add sparkles using splatters from a Wink of Stella glitter brush. Cut a narrow strip (0.8cm tall) and then stamp sentiment in Basic Gray.

Next we construct the slider mechanism. Add the strip of DSP to the Basic White layer and in turn add that to the Pool Party Slider, positioning it under the narrow scoore line. Apply Tear & Tape as shown - it is important to apply the tape to the edges of the pockets to enable the slider to move.


The pockets are not closed flush so that it is easier to slide them and to insert the gift card into them. I placed a ruler between the layers to bevel the card as I was sticking them down.


Place the top of the slider up to the narrow score line and then close the top of the card down on to it. When the top of the card is opened the attached slider will move up too.


To complete the Gift Card Holder, fold the bottom pocket up enclosing the Slider
. Again, making sure that there is room to allow free movement.


Using Dimensionals, add the elements for the topper ensuring that you only apply adhesive to the top of the banner! 


Once the topper is in place the sentiment can be placed towards the bottom of the card. Finish with Peppermint embellishments.


Some of the cards were made with an alternative DSP. I used a Cloud Cover sheet from the Cheers & Sips pack which has a wintery feel to it.


After my production line to create them, I needed to lay them all out and record the achievement before packing them up ready to swap!


I am looking forward to swapping and being inspired (and maybe growing my wish list!). I hope you are feeling inspired to create something - let me know in the comments!

Do you need any of the products used on today's cards? If you live in the UK please take a look in my online Stampin' Up! shop. You can follow the link or click on the pictures below of the products I have used today.

Stay safe and as always, happy crafting,


If you would like to order any supplies, and you live in the UK, I would love to be your demonstrator.
To place an order please visit my online shop HERE. The products I have used on today's project are linked from the images shown below.

All Star Video Class Bundles 

The Video Class Bundles have 12 AMAZING video tutorials to inspire you each month. For September, we are featuring the Painterly Pears Suite.


Click HERE to purchase.

FREE with a purchase from my online store

 Stampin' Rewards Program 


When shopping, remember to opt in to Stampin' Rewards on orders over £20.

Click on the images of the products I have used today to purchase them in my online shop: