Hello and welcome to my blog. Today, I am sharing a bee card with happy colours. My aim was to cheer myself up because the scene outside my window was quite dull (the weather seems to be like that quite a lot of the time at the moment!).
Do you ever feel overwhelmed when you start using a new stamp set or bundle? You've been really excited about opening a new set and then the creative block sets in and you don't know what to do? My solution to that is to just start stamping. Sometimes, I stamp all the images on to a blank sheet of card and create a One Sheet Wonder. On other occasions, I take inspiration from the pages of the catalogue, which is exactly what I did here. On Page 5 of the new Mini Catalogue there is an adorable card featuring the Honey Bee Bundle, so I had a go at making that as my warm up. I didn't copy it exactly, but my cards are really pretty similar.
With two cards under my belt I felt the ideas start to flow and I went on to make several other cards. This is the first one that I completed.
I have used my favourite small square card and then the Detailed Bee Dies to decorate. The layers for the card measure:
- Mint Macaron card 19.8cm x 9.9cm, scored at 9.9cm
- Early Espresso 9.4cm x 9.4cm
- Whisper White 9cm x 9cm
The beehive is stamped in Crushed Curry and the bee is in Early Espresso. These were then cut out using the coordinating dies, together with two of the honeycomb elements. The sentiments are also stamped using Early Espresso ink.
The Wishing you Sunshine & Happiness stamp is curved, and fits neatly
around the beehive shaped hole. The Celebrate sentiment is part of a longer
expression, so I only inked up the part of the stamp using a
Stampin' Write Marker. (But, you could use a regular ink pad too - use a Post-It note to cover the portion of the stamp you don't want to print -
but don't forget to discard the inky Post-It note before you stamp your
card.)
To assemble the card, I lined up the white layer over the top of the Early Espresso one and then adhered the bee hive through the die cut hole. This ensures that it is fixed in the correct position and you will get an even border between the layers. The honey comb layers are sandwiched between the white and Early Espresso layers. The die cut hole then sits snuggly over the behive.
The bee is coloured using my Crushed Curry Stampin' Write Marker and a given a hint of sparkle by using the Wink Of Stella Glitter brush. Finally, there are a few Metallic Pearls added to complete the look. Even though the weather didn't brighten up I felt much more cheery after making these cards! I hope that they have brightened your day too.
If
you want to purchase the items used for these cards, or any other
supplies, please take a look in my online Stampin' Up! shop. You can
follow the link or click on the pictures below of the products I have
used today.
As always, happy crafting,
If
you would like to order any supplies, and you live in the UK, I would
love to be your demonstrator. Use the hostess code 9RWZ7F4Q
to get some
free product (it will follow in the post after the end of the month). If
your order is over £150 do not use the code as you become the hostess
and get rewards. To place an order please visit my online shop HERE.
If you would like to join my team, you can choose your starter kit HERE and if you have any questions, please contact me at furrycatdesigns@gmail.com
Click on the images below to purchase them in my online shop:
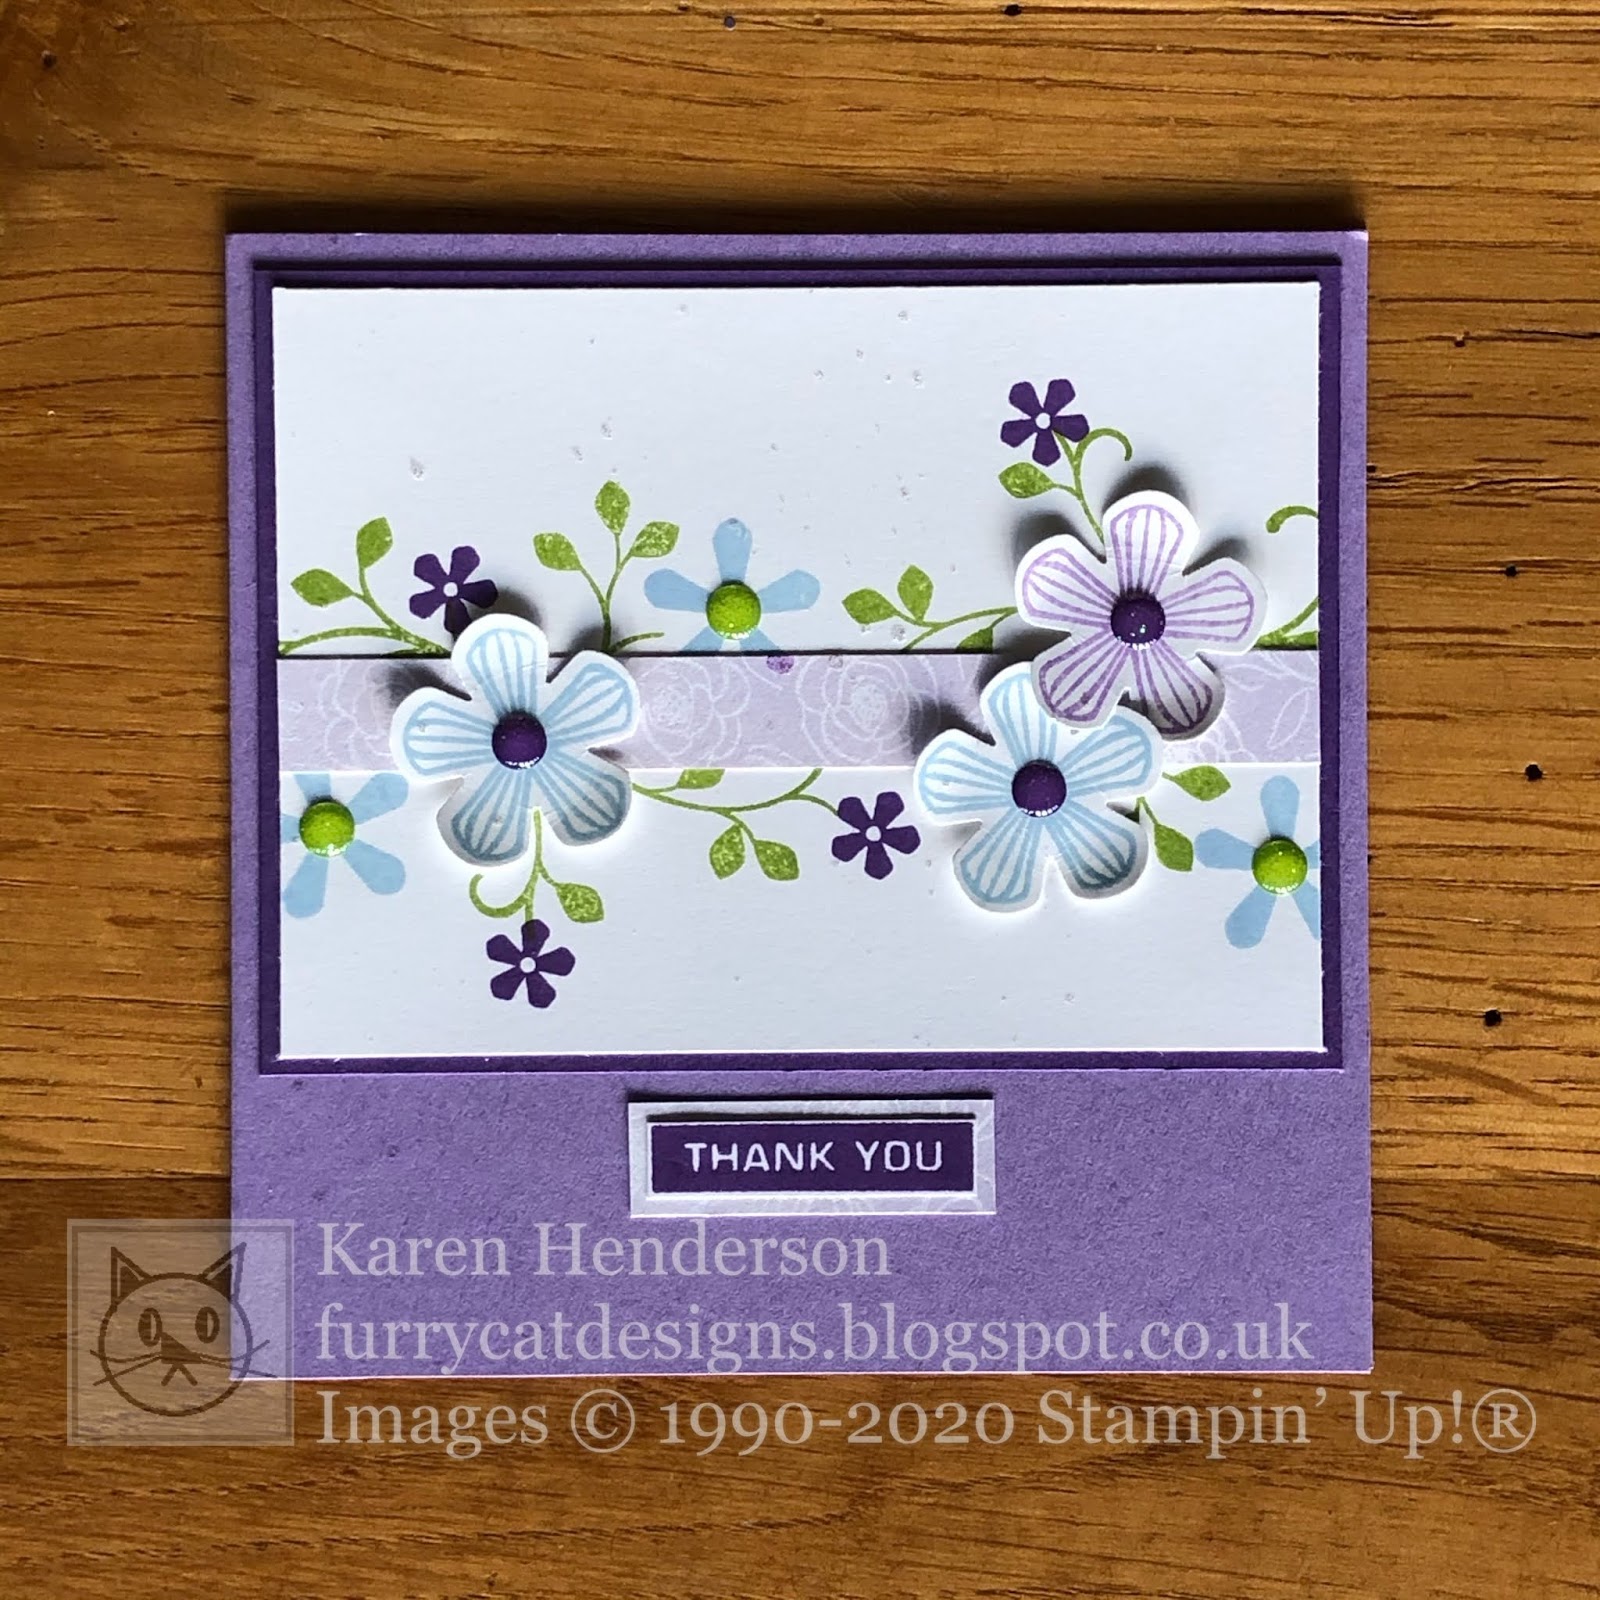
Hello and welcome to my blog. The last few days have been cold and frosty so it feels like proper Winter weather has finally arrived. The sky has been blue which is so welcome after all the dull grey we have been experiencing. So, bright cheery weather outside encouraged me to make a card that follows suit.
The layout I have used was inspired by a Christmas card that I received from a pupil at school. I always love making cute square cards, but this one has the new feature for me to include a rectangular layer. My card uses the same stamps and inks as a wonderful card that I saw by Patty Bennett, so I have CASED her design and made it my own. Inspiration comes from all sorts of places.
The card base is Highland Heather with a layer of Gorgeous Grape and Whisper White to stamp on. It's such a harmonious combination. The inks I have used are: Highland Heather, Gorgeous Grape, Granny Apple Green and Seaside Spray.
I stamped a heap of flowers using the Thoughtful Blooms stamps and then punched them out using the coordinating Small Bloom punch (which are both from the Sale-A-Bration offerings). Then, I stamped a couple of sprigs of foliage in Granny Apple Green and added stamped flowers to fill in the space. A skinny, 1cm strip of Best Dressed DSP sits across the the panel and then three punched flowers are placed on the top.
The Glitter Enamel Dots are gorgeous! I really must use them more often. I added some splatters from a Wink Of Stella pen and together they add a subtle amount of colour and sparkle to the card.
The finishing touch is the sentiment which comes from the Label Me Bold stamp set. I have used Thank You because that is what I needed, but it would look equally good with any one of the sentiments that are in the set, including Happy Birthday, Hello or Well done. I trimmed the sentiment using Snips and adhered it to a left over piece of DSP before positioning it on the card.
I am happy to say that the card has already been delivered and was well received! I hope you like it too. If
you want to purchase the items used for this card, or any other
supplies, please take a look in my online Stampin' Up! shop. You can
follow the link or click on the pictures below of the products I have
used today.
As always, happy crafting,
If
you would like to order any supplies, and you live in the UK, I would
love to be your demonstrator. Use the hostess code 9RWZ7F4Q
to get some
free product (it will follow in the post after the end of the month). If
your order is over £150 do not use the code as you become the hostess
and get rewards. To place an order please visit my online shop HERE.
If you would like to join my team, you can choose your starter kit HERE and if you have any questions, please contact me at furrycatdesigns@gmail.com
Click on the images below to purchase them in my online shop:
Hello
and welcome to my blog. I am thrilled to be taking part in a blog hop
with fellow demonstrators, from around the world, who are part of Kylie
Bertucci's training program. There is no theme for the hop, but there is
sure to be a wealth of inspiration for creating with Stampin' Up!
products.
I really enjoy making and sending cards - it makes me happy! They can be made for all sorts of occasions, even 'just because' for no special reason! Thank You themed cards are probably the type of cards I make the most of, because there are plenty of reasons to send a Thank You.
Recently, I participated in a card swap by post to mark the launch of the new Mini catalogue and the Sale-A-Bration brochure. I made a batch of these cards, featuring the Thoughtful Blooms stamps from the Sale-A-Bration brochure and in return I will get a batch of different cards to inspire and tempt me! I love swapping with fellow Demonstrators, whether it be in person at Stampin' Up! events or through the post or virtually as part of a blog hop! It's a great way to share ideas.
I have used Stampin' Up! Notecards for my card base. Layers of Mint Macaron and Blueberry Bushel frame the stamped Whisper White piece, which is stamped with a mixture of flowers and leaves to create a random background using a variety of colours. To give the background some texture I embossed it using the Subtle embossing folder and then splattered it with my Wink of Stella Glitter Pen. These two steps are completely optional as the little panel looks fabulous either naked or embossed/splattered!
To finish the card, I wrapped some of the Mint Macaron Sheer Linen Ribbon around the white/blue layer before mounting it onto the Mint Macaron layer. I tied a dainty bow and attached that using a glue dot. Finally, I stamped the Thank You.
I think this card has a clean, fresh feeling about it. I hope you approve! Thank
you for visiting my blog today - you are currently visiting Karen
Henderson. Please look at the list below to see who to visit next. I am
sure you will find lots of inspiration on your journey around the hop.
Make sure you don't miss any!
Blog Hop List:
If
you want to purchase the items used for this card, or any other
supplies, please take a look in my online Stampin' Up! shop. You can
follow the link or click on the pictures below of the products I have
used today.
As always, happy crafting,
If
you would like to order any supplies, and you live in the UK, I would
love to be your demonstrator. Use the hostess code 9RWZ7F4Q
to get some
free product (it will follow in the post after the end of the month). If
your order is over £150 do not use the code as you become the hostess
and get rewards. To place an order please visit my online shop HERE.
If you would like to join my team, you can choose your starter kit HERE and if you have any questions, please contact me at furrycatdesigns@gmail.com
Click on the images below to purchase them in my online shop:
During Sale-A-Bration for every £45 spent on any Stampin' Up! products (before Shipping and Handling) you can choose a FREE Sale-A-Bration item. The Thoughtful Blooms stamp set is one of the items you can choose.